

Description
Starlight Space Program turns Minecraft into a playable space-exploration progression: craft mission tools like the Telescope, Observatory Console, Mission Log, and Astronav Chip, build a Rocket Assembly Table and Launch Pad, assemble rockets, and launch to reach space. When you rise to Y 700 the mod opens a solar-system UI where you can click planets (Mercury through Neptune) to begin server-authoritative travel to custom planet surface dimensions, each with its own themed surface blocks, moon counts, and action-bar moon tracking — clicking Earth instead returns you safely to the Overworld spawn and shows a return-course message. Start by learning the new recipes, placing a Space Center computer or Observatory to plan missions, then build and launch rockets to explore distinctly themed worlds from cratered gray Mercury regolith to dark stormy Neptunian ice.
Mod Wiki
Starlight Space Program
Quickstart
- Craft a Telescope — your first step in the tech tree.
- Craft a Rocket Assembly Table and a Launch Pad, and place them both.
- Craft an Astronav Chip, then use it to assemble a Rocket.
- Place the Rocket on the Launch Pad and launch. Rise to Y 700 to trigger the Solar System Map.
- Click any planet in the UI to travel to its surface dimension. Click Earth to return to the Overworld.
Overview
Starlight Space Program adds a space-exploration progression to Minecraft. You craft mission tools, build a launch facility, assemble rockets, and blast off to visit custom surface dimensions for every planet from Mercury to Neptune. Each planet has unique terrain blocks and a moon count visible from its surface. Earth acts as your "return home" button, sending you back to the Overworld spawn.
What It Adds
Items
| Item | Purpose |
|---|---|
| Telescope | Crafting ingredient; early tech step |
| Astronav Chip | Core navigation component for rockets and computers |
| Rocket | Launches you to space when placed on a Launch Pad |
| Mission Log | Notes and mission tracking |
Blocks
| Block | Purpose |
|---|---|
| Rocket Assembly Table | Workstation for assembling rockets |
| Launch Pad | Place rockets here to launch |
| Observatory Console | Plan and review missions |
| Space Center Computer | Mission control hub |
| Moon Marker | Decorative/functional marker placed on planet surfaces |
Planet Surface Blocks
Each planet dimension generates with its own themed surface block:
| Planet | Surface Block |
|---|---|
| Mercury | Mercury Regolith |
| Venus | Venus Dust |
| Mars | Martian Dust |
| Jupiter | Jovian Cloud Stone |
| Saturn | Saturn Ring Stone |
| Uranus | Uranian Ice |
| Neptune | Neptunian Ice |
How To Use
Building Your Space Center
Place an Observatory Console or Space Center Computer to begin planning missions. These blocks serve as your mission control setup before launch.
Launching
- Place a Launch Pad on the ground.
- Place your Rocket on it.
- Trigger the launch. As you ascend past Y 700, the Solar System Map opens automatically.
The Solar System Map
- A full-screen UI shows the Sun at the center and all eight planets arranged around it.
- Each planet button shows its name. Hover over a planet to see its description and moon count.
- Click a planet to begin server-authoritative travel to that planet's surface dimension.
- Click Earth to return safely to your Overworld spawn — a return-course message will confirm the trip.
- Press Esc to close the map without traveling.
Moon Tracking
While on a planet's surface, your action bar displays how many moons are visible from that world. Moon counts vary by planet and are also shown when hovering over planets in the Solar System Map.
Crafting And Obtaining
Craft items in the following order for a smooth progression:
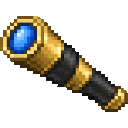
Telescope — the foundation of the tech tree:


Mission Log — shapeless, craft anywhere:


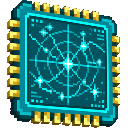
Astronav Chip — required for rockets and computers:



Rocket Assembly Table — your assembly workstation:

Launch Pad — required to launch rockets:

Observatory Console — mission planning block:
Space Center Computer — mission control hub:


Rocket — the vessel that gets you to space:

Progression And Strategy
- Early game: Gather iron, copper, redstone, and glass. Craft the Telescope first — it feeds into the Observatory Console recipe.
- Mid game: Craft the Astronav Chip (requires diamond), then build the Rocket Assembly Table and Launch Pad. Set up an Observatory Console or Space Center Computer at your base.
- Launch: Craft a Rocket and place it on the Launch Pad. Ascend to Y 700 to open the Solar System Map.
- Exploration: Visit planets in any order. Each surface dimension has unique terrain blocks you can mine and collect. Moon Markers can be placed to mark explored areas.
- Returning home: Select Earth in the Solar System Map at any time to be transported back to your Overworld spawn point.
Tip: Build your launch facility with room to expand — you'll want an Observatory Console and Space Center Computer nearby for the full mission-control experience.
How to install
This Java mod can be used on Windows and Mac PCs with the CreativeMode Launcher or any Minecraft launcher of your choice.

1. Download and install the new CreativeMode Launcher
2. Click to play on the top of the screen.
3. That's it — launches instantly. No complicated setup required.
Want to use on a different launcher? Download mod and manually install.
This mod is licensed under the CreativeMode Mods License.